Galentine's Chocolate Marble Cake
Highlighted under: Indulgent Baking Ideas
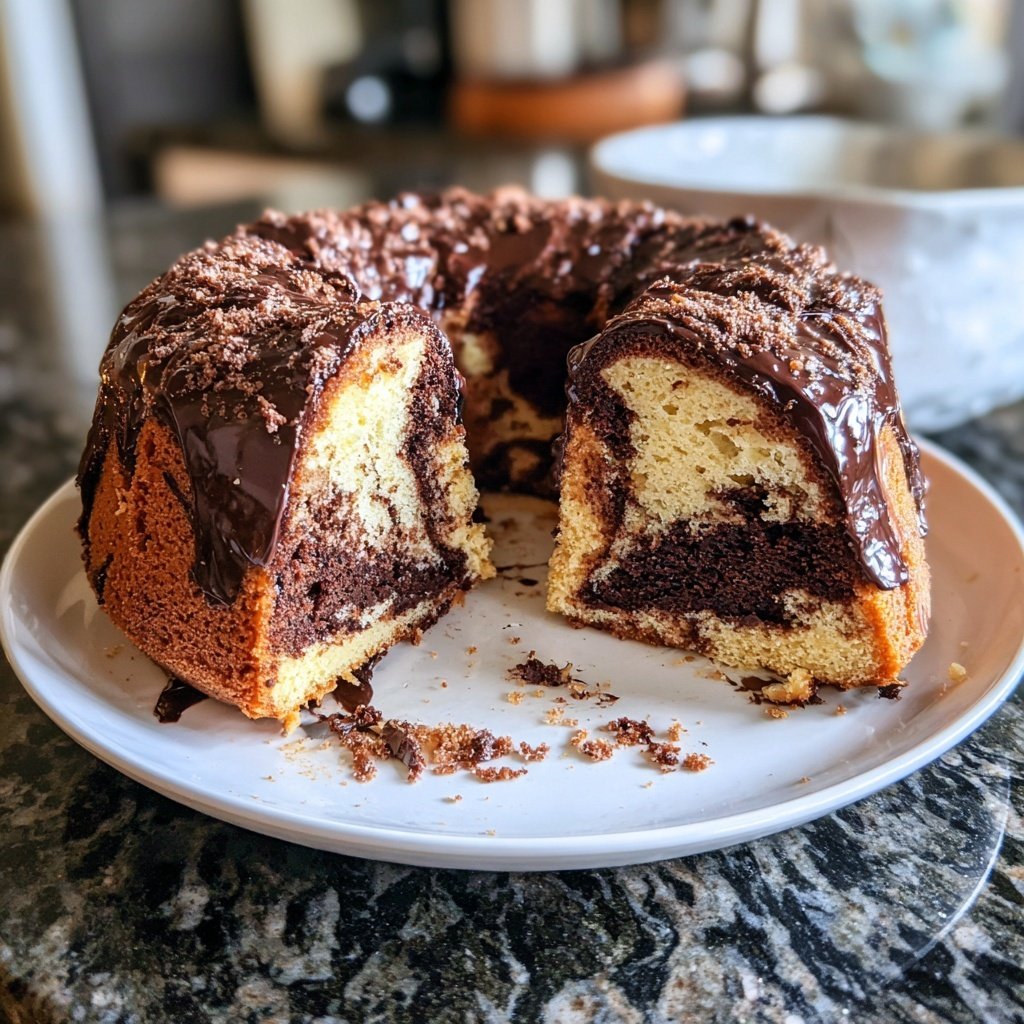
I absolutely adore baking, especially when it brings friends together! This Galentine's Chocolate Marble Cake is not just visually stunning but also a delightful fusion of rich chocolate and delicate vanilla flavors. As we gather to celebrate our friendships, this cake becomes a centerpiece, perfect for sharing. With each slice, you're met with a beautiful marbled effect that proves not only to be a feast for the eyes but also a sweet indulgence that leaves everyone smiling. I can't wait for you to try it!
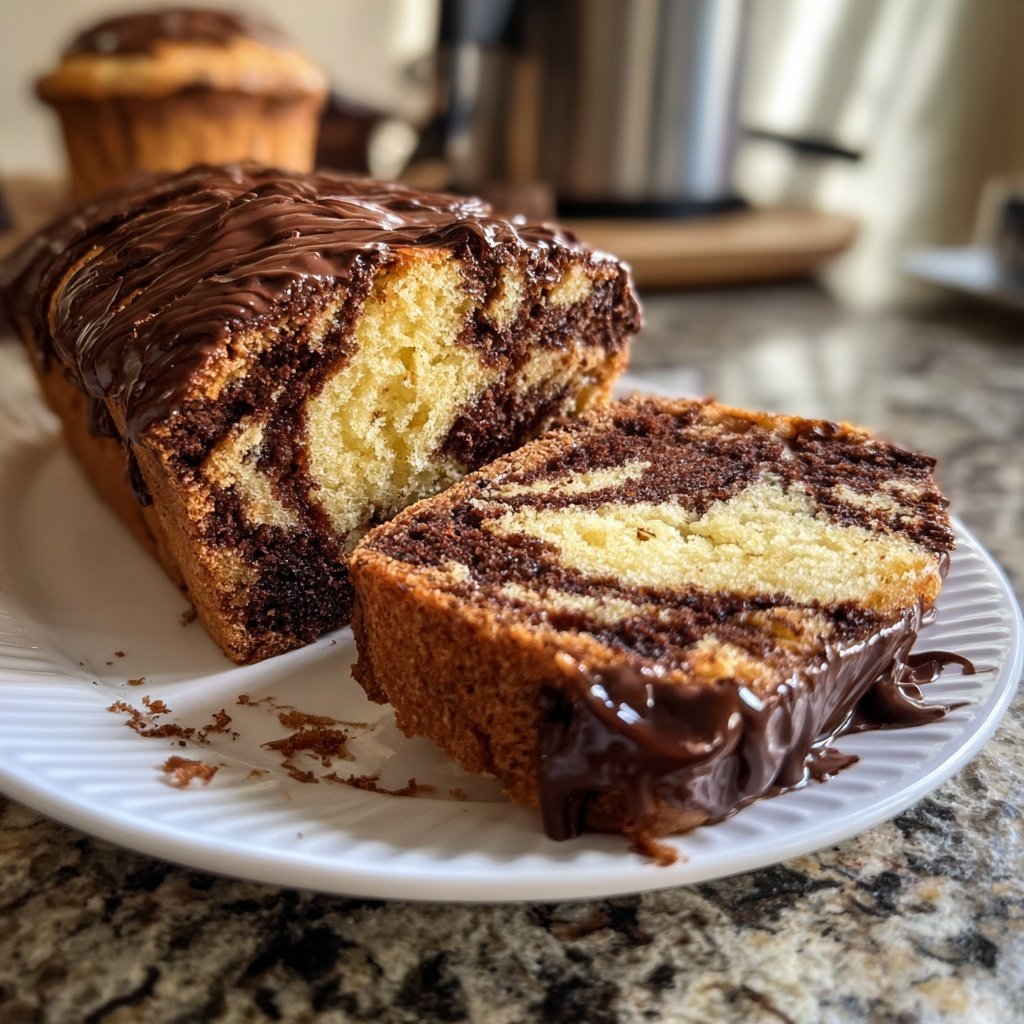
As I prepared for Galentine's Day, I decided that a chocolate marble cake would be the perfect dessert. The combination of flavors is what makes it special. I experimented with different ratios of chocolate to vanilla batter, and found that a 50/50 mix creates an amazing balance that is both rich and light. The marbling technique was a fun part; simply swirling the two batters together resulted in beautiful patterns that delighted my guests.
Throughout the baking process, I learned that using room temperature ingredients helps create a smoother batter, which is crucial for the marbled look. This cake is not just for Galentine’s; it’s a versatile dessert that can be enjoyed year-round. Trust me, this moist cake topped with a chocolate glaze is sure to impress, whether you’re celebrating friendship or just indulging in a sweet treat!
Why You'll Love This Recipe
- Rich chocolate flavor paired with fresh orange zest
- Creamy texture that melts in your mouth
- Perfect for celebrations or as a sweet indulgence
Understanding the Marble Effect
Creating a beautiful marble effect in your cake is all about technique. When swirling the batters, use a knife or a skewer to create gentle folds rather than aggressive mixing. This careful approach maintains the distinct layers of chocolate and vanilla, allowing for a stunning visual appeal in each slice. Aim to achieve a ‘marbled’ look, which means that both batters should be visible without becoming fully blended together.
A common mistake is over-mixing the batters when swirling, which can result in a uniform color rather than the desired marbled Pattern. To avoid this, start by dropping spoonfuls of the two batters into the pan in alternating fashion. Then, use your knife lightly to create simple swirls, taking care to maintain the integrity of both batters.
Perfecting the Glaze
When preparing the glaze, it's crucial to whisk the powdered sugar and cocoa powder together first to eliminate any lumps. If your glaze is too thick, gradually add more milk, one teaspoon at a time, until you reach a drizzling consistency. Conversely, if it becomes too runny, a light dusting of powdered sugar can help thicken it back to your desired texture.
For added flavor depth, consider infusing your glaze with orange zest or a splash of espresso, both of which will complement the chocolate beautifully. Allow the glazed cake to sit for at least 30 minutes before slicing, letting the glaze set slightly for a neater presentation.
Storage and Make-Ahead Tips
This Galentine's Chocolate Marble Cake is ideal for make-ahead planning. Once cooled completely, wrap the cake tightly in plastic wrap and store in an airtight container at room temperature. This method keeps the cake moisture intact for up to three days, making it a great option for friends’ gatherings.
If you’d like to extend the cake's life even further, consider freezing individual slices. Wrap each slice in plastic wrap and aluminum foil after the glaze has set, and store them in the freezer for up to three months. To enjoy, simply thaw at room temperature for a couple of hours or heat briefly in the microwave. This allows you to indulge in this delightful cake whenever the craving strikes!
Ingredients
Here's what you'll need to make this delectable cake!
For the Cake
- 1 ¾ cups all-purpose flour
- 1 ½ teaspoons baking powder
- ½ teaspoon salt
- ¾ cup unsweetened cocoa powder
- 1 cup sugar
- ½ cup unsalted butter, softened
- 3 large eggs
- 1 cup milk
- 1 teaspoon vanilla extract
For the Glaze
- 1 cup powdered sugar
- 2 tablespoons cocoa powder
- 2 tablespoons milk
- ½ teaspoon vanilla extract
With all your ingredients ready, it's time to start baking!
Instructions
Follow these easy steps to create your marbled masterpiece.
Preheat and Prepare
Preheat your oven to 350°F (175°C). Grease and flour a 9-inch round cake pan.
Mix Dry Ingredients
In a medium bowl, whisk together the flour, baking powder, salt, and cocoa powder. Set aside.
Cream Butter and Sugar
In a large bowl, cream the butter and sugar together until light and fluffy. Add the eggs one at a time, mixing well after each addition.
Combine Wet and Dry
Gradually add the dry ingredients to the butter mixture, alternating with the milk. Stir in the vanilla extract until just combined.
Marble the Batter
Divide the batter into two bowls. Add cocoa powder to one bowl and mix. In the prepared pan, alternate spoonfuls of each batter, then use a knife to swirl them together gently.
Bake the Cake
Bake in the preheated oven for 30 minutes or until a toothpick inserted in the center comes out clean. Allow to cool in the pan for 10 minutes, then turn out onto a wire rack.
Prepare the Glaze
In a bowl, whisk together powdered sugar, cocoa powder, milk, and vanilla to form a smooth glaze.
Glaze and Serve
Once the cake is completely cool, pour the glaze over the top, letting it drip down the sides. Slice and enjoy!
Now that your cake is ready, it's time to dive into this delicious treat!
Pro Tips
- Make sure all ingredients are at room temperature for best results. Use a toothpick to check for doneness
- the cake should not be wet but still slightly moist.
Ingredient Insights
Using unsweetened cocoa powder is essential for this recipe, as it balances the sweetness from the sugar while providing a deep chocolate flavor. If you only have sweetened cocoa powder, consider reducing the sugar in the recipe slightly to avoid an overly sweet cake.
The addition of orange zest can elevate the flavor profile of your cake significantly. It pairs remarkably well with both chocolate and vanilla, brightening the overall taste. Just be sure to finely grate the zest to avoid any bitter bits in your finished product.
Serving Suggestions
This chocolate marble cake stands beautifully on its own, but for a special touch, serve it with a dollop of whipped cream or a scoop of vanilla ice cream. Fresh berries also make a delightful garnish, offering a pop of color and tartness that balances the sweet richness of the cake.
For celebrations, consider decorating the top of the glazed cake with edible flowers or sprinkles for an extra festive look. They can add an inviting visual element, enhancing its appeal as a centerpiece for your Galentine's gathering.
Questions About Recipes
→ Can I use gluten-free flour?
Yes, you can substitute all-purpose flour with a gluten-free blend. Ensure it has a binding agent for the best texture.
→ How can I store leftovers?
Store the cake in an airtight container at room temperature for up to 3 days, or refrigerate for up to a week.
→ Can I freeze the cake?
Absolutely! Wrap it tightly in plastic wrap and foil, and it can be kept in the freezer for up to 3 months.
→ What can I substitute for eggs?
You can use unsweetened applesauce (1/4 cup per egg) or a flax egg for a vegan alternative.
Galentine's Chocolate Marble Cake
Created by: The Meals By Sophia Team
Recipe Type: Indulgent Baking Ideas
Skill Level: Intermediate
Final Quantity: 8 servings
What You'll Need
For the Cake
- 1 ¾ cups all-purpose flour
- 1 ½ teaspoons baking powder
- ½ teaspoon salt
- ¾ cup unsweetened cocoa powder
- 1 cup sugar
- ½ cup unsalted butter, softened
- 3 large eggs
- 1 cup milk
- 1 teaspoon vanilla extract
For the Glaze
- 1 cup powdered sugar
- 2 tablespoons cocoa powder
- 2 tablespoons milk
- ½ teaspoon vanilla extract
How-To Steps
Preheat your oven to 350°F (175°C). Grease and flour a 9-inch round cake pan.
In a medium bowl, whisk together the flour, baking powder, salt, and cocoa powder. Set aside.
In a large bowl, cream the butter and sugar together until light and fluffy. Add the eggs one at a time, mixing well after each addition.
Gradually add the dry ingredients to the butter mixture, alternating with the milk. Stir in the vanilla extract until just combined.
Divide the batter into two bowls. Add cocoa powder to one bowl and mix. In the prepared pan, alternate spoonfuls of each batter, then use a knife to swirl them together gently.
Bake in the preheated oven for 30 minutes or until a toothpick inserted in the center comes out clean. Allow to cool in the pan for 10 minutes, then turn out onto a wire rack.
In a bowl, whisk together powdered sugar, cocoa powder, milk, and vanilla to form a smooth glaze.
Once the cake is completely cool, pour the glaze over the top, letting it drip down the sides. Slice and enjoy!
Extra Tips
- Make sure all ingredients are at room temperature for best results. Use a toothpick to check for doneness
- the cake should not be wet but still slightly moist.
Nutritional Breakdown (Per Serving)
- Calories: 380 kcal
- Total Fat: 26g
- Saturated Fat: 15g
- Cholesterol: 195mg
- Sodium: 85mg
- Total Carbohydrates: 32g
- Dietary Fiber: 3g
- Sugars: 24g
- Protein: 6g